According to Shopify,you can but being a born skeptic, I needed more solid proof that it can be done, so we set out to test the theory and not only to see if it is possible, but if it is possible to do on a budget.
A bit of an admission before we dive straight in. I've got a bit of a history in photography although mostly in the realm of motorsport. It's fair to say that I may know a bit more about lighting, composition, camera settings and other aspects than the average Joe, but with the instructions below, you should be able to achieve the same results.
We started by gathering up all the "ingredients" for our photo box and although there are a few things we'll do differently the next time, this worked, and it should also work for you.

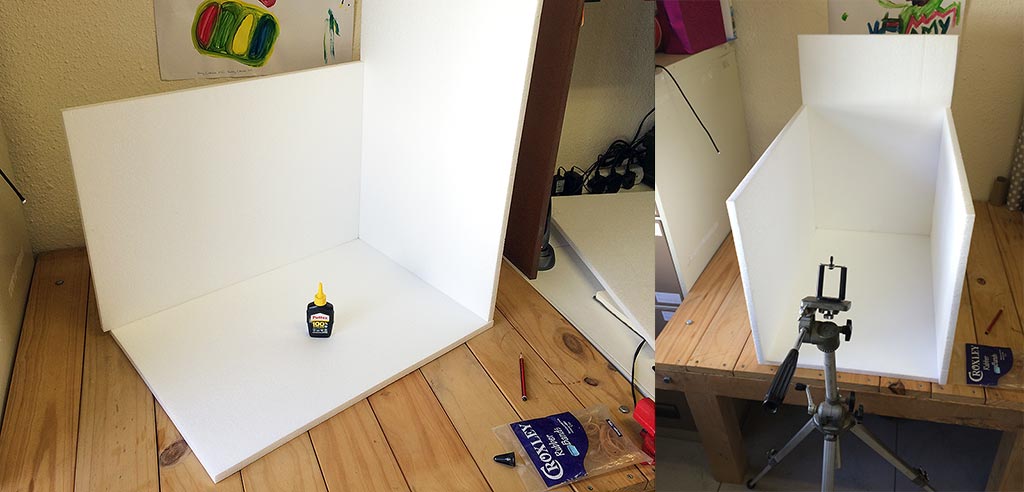
Using the glue, stick the box together, pin in place and allow to dry. I stuck the back board on first and the sides on after that. If the boards are decent quality it should all naturally align at right angles.
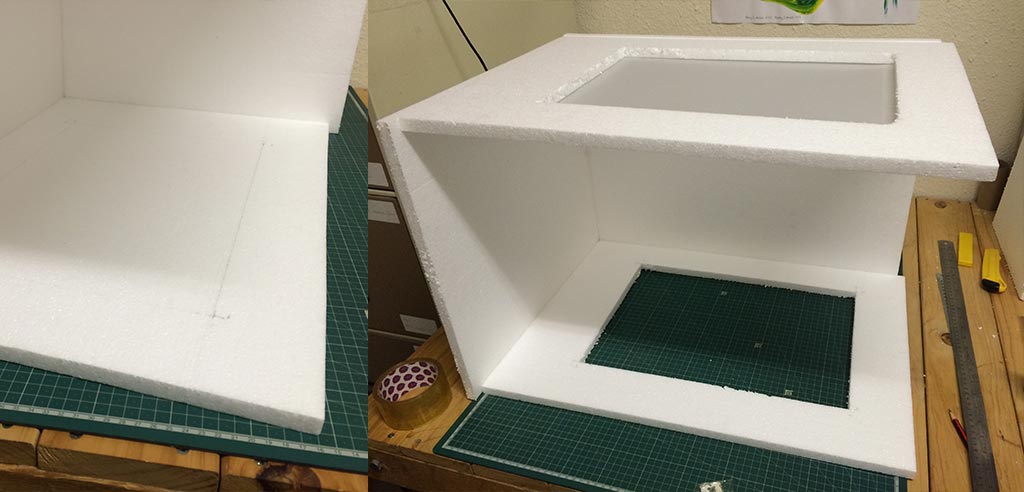
Once the glue is properly dried (I left it for 24hrs), flip it on it's side and carefully measure out the holes for the "windows". I left about 1cm "bleed" for the tracing paper to not be precariously placed on the frame.
Cut them out with the ruler and NT cutter while clenching your teeth to the awful screechy sounds it produces.
This was slightly tricky, but not impossible. Lay the tracing paper over the aperture hole of the frame and place a small piece of tape on each corner working diagonally (place one piece in a corner, place a piece diagonally opposite it and then the final two corners while pulling it tight each time). This allows the paper to be sufficiently taught and not have waves / wrinkles.
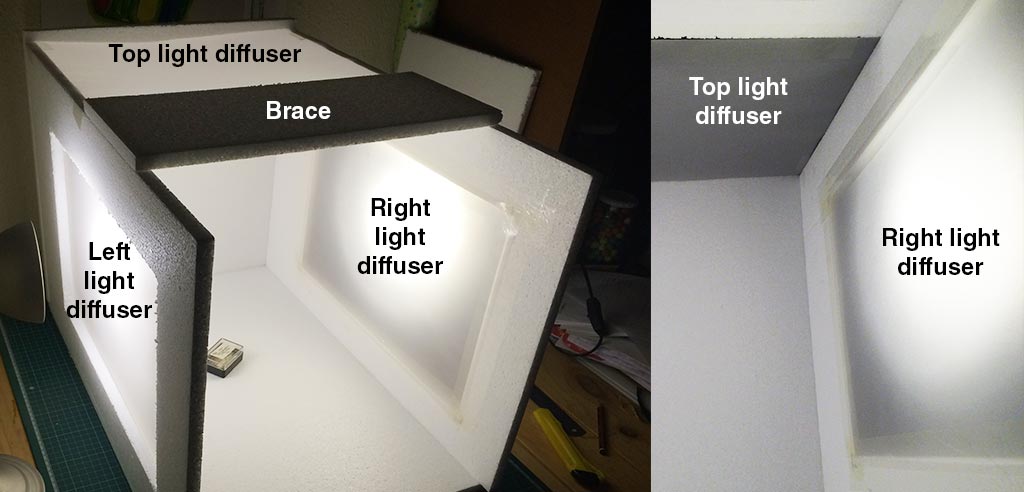
Finally lay a nice full length strip of tape on each edge of the paper to provide the final seal.
I stuck the paper on the inside of the box so there weren't any corners visible. A matte finish tape would probably be better if you can find it.
Due to the international paper dimensions being what they are, you can now take a sheet of tracing paper and stick it at the top rear of the box.
Now, important if you just stick it there, you risk the box being pulled inwards like a bow and breaking, so I cut the rear upright excess polystyrene board off and stuck it over the middle top of the box as a brace. This is where the pins came in handy as they kept the brace in place while the glue dried. Again I left it overnight to set properly.
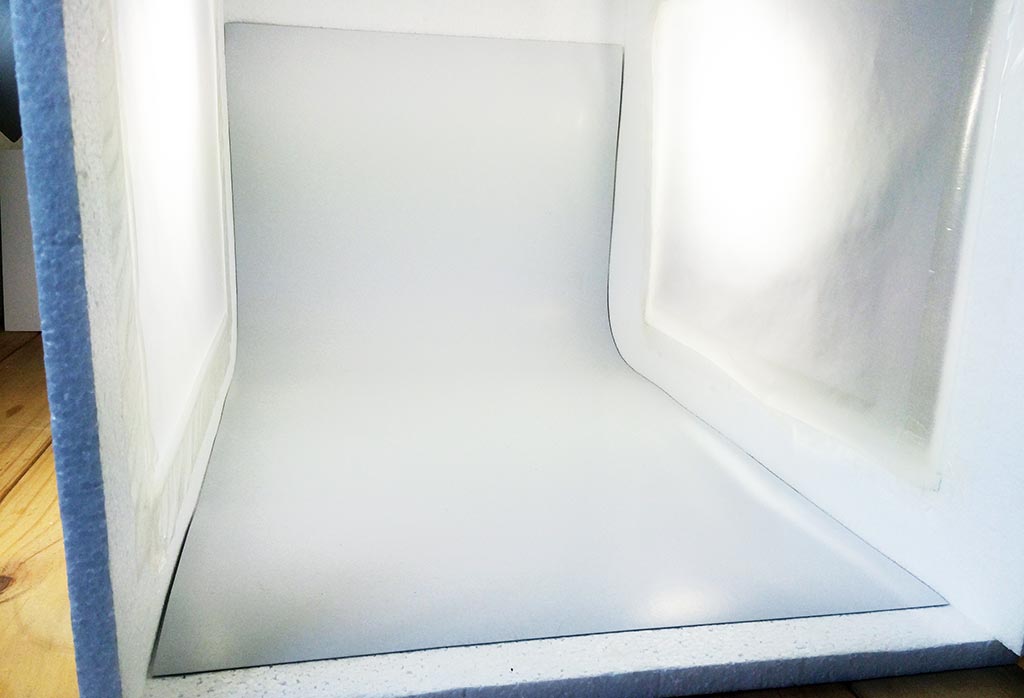
Measure the width of the inner portion of the photo box and then cut the white cardboard length wise to fit snugly inside the box. Make sure you err on the side of not cutting enough cardboard off and rather shave slivers off to make it fit tight and snug.
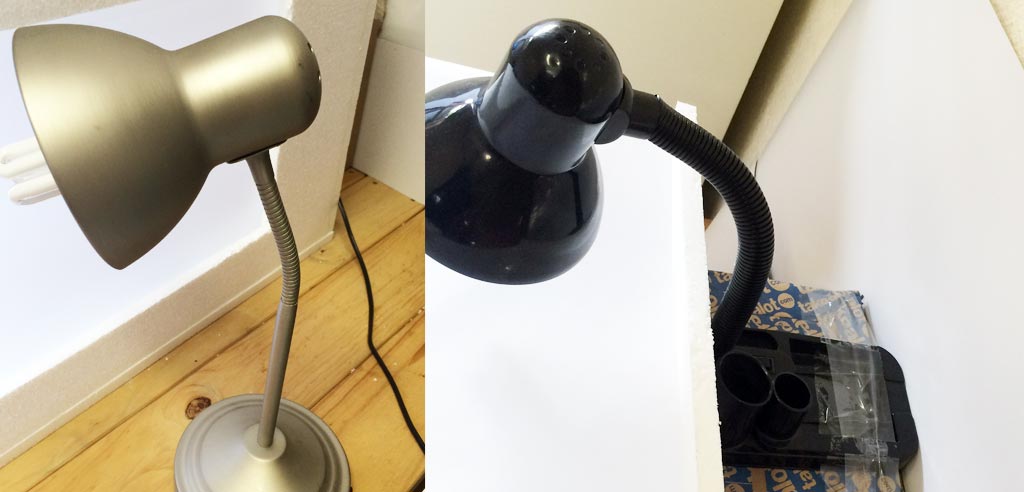
I didn't think it would be necessary to explain how to put a lightbulb into a lamp nor how to plug them in nor switch them on. Simply do it, and if you struggle, I think your issues may be greater than this little tutorial covers.
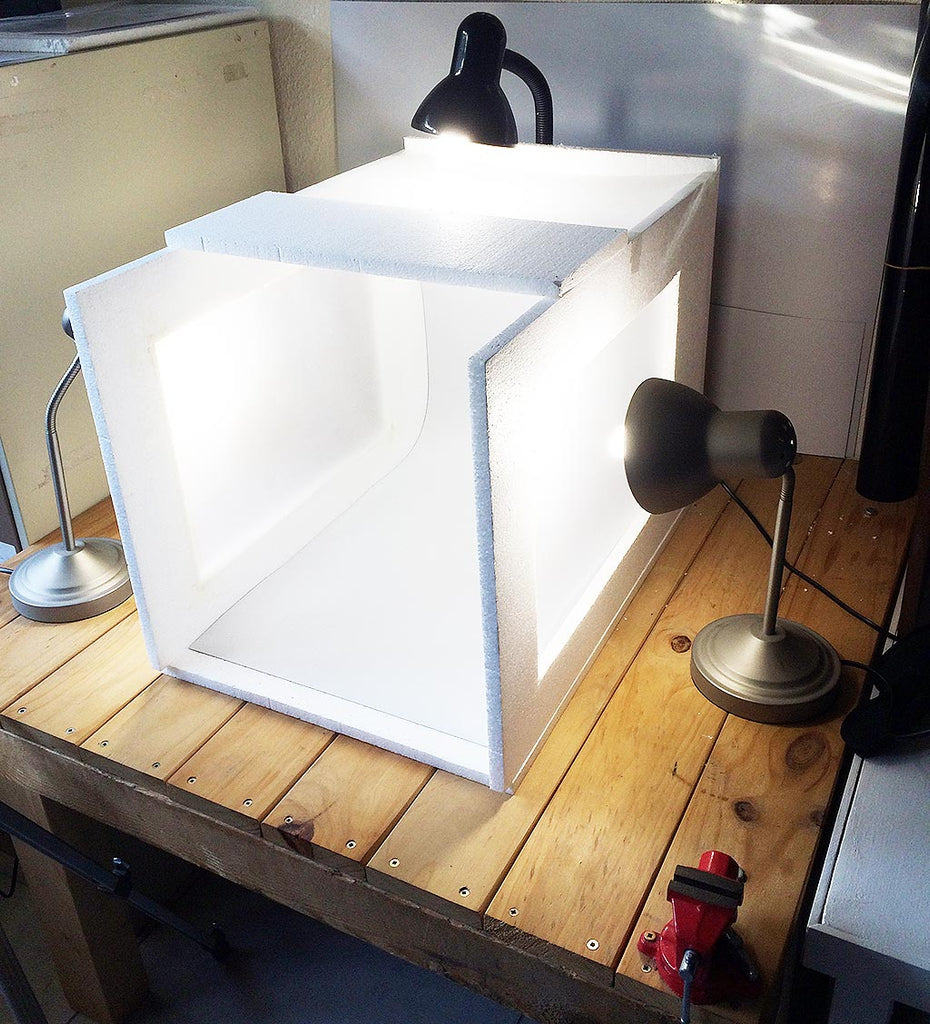
I aim the lights as shown in the picture below and one thing extra I needed to find to install the top light was a box behind the photo box to put the lamp on. I taped the lamp to the box so it didn't fall through the roof.
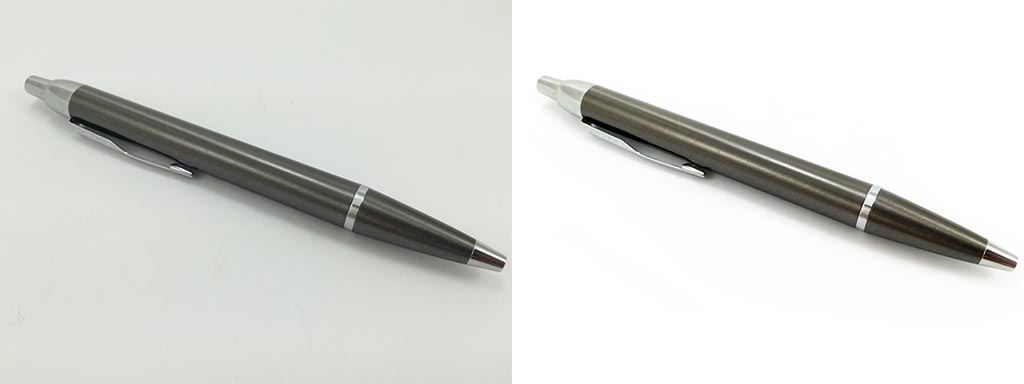
With a little post production in Photoshop or similar, you can quite quickly have results like below.